Today I’m going to show you how to turn a ClickFunnels footer into a template.
In fact, with this guide you’ll be able to turn whatever section you want into a template.
One of the first things that comes to my mind when it comes to building funnels besides quality, is speed.
Because the faster you can build your funnels, the faster you can get traffic to them, and the faster you can convert that traffic into leads.
And one way that sped up the building process was when I started using templates when I was creating new funnels.
This way I didn’t have to create the same sections over and over again, wasting time that could have been spent on something more important, like copywriting.
Because let’s face it, some sections within a funnel stays the same no matter what funnel you’re building, like the header and the footer for example.
And in this no-nonsense guide, I’ll cut out all the noise and BS and show you exactly how to turn a section of your funnel into a template.
Why Use Templates
It’s simple…
To save precious time when you’re creating your funnels.
Also, this way you know that all your pages look congruent and have all the correct links.
Speaking of links, that’s probably the no.1 cause to why I started saving sections of my funnels as templates.
Because I got tired of having to keep track of what links goes where.
Instead of having a document that keeps track of links to:
- About page
- Contact page
- Disclaimer
- Terms and condition
- Privacy
- Etc…
You can instead create one footer in one funnel, add all the correct links to it and then save the entire section as a template.
Doing it this way saves you the hassle of having to create a new footer for each new funnel step.
With a template you can import your footer in seconds with one click (as you’ll see later), and use the time you saved to brew another cup of coffee.
The added benefit to this is that you don’t have to worry about if you added all the links or if they go to the right place.
Now you know that when you add a footer to your funnel inside ClickFunnels, it will work properly…every time.
A Word Of Advice
There are some things that I like to point out before we get started.
The first thing you need to know is: Templates aren’t limited to just footers, you can essentially turn every section or row inside of ClickFunnels into a template.
I just choose to do this guide on footers since they are an important part of your funnel. But you could just as well turn your header into a template, or an entire opt-in form.
The second thing is: Once you add a template to a funnel, you can change it however you want.
It doesn’t affect the root template at all, so you always have the original saved.
Herin also lies the problem, to change the root template you basically have to create a new tamplate and save it as V2 or something. Then you can delete version 1.
However, this does not update any funnels using the V1 template, so you have to manually add the new one if you want other funnels to use it.
Unlike WordPress where templates have their own editors panel, and changing one there or somewhere else will cause the original to change too.
The third one is: Deleting a template from the library doesn’t effect your funnels.
Once you’ve added the template, you can delete the root template completely, it will still be visible in your funnel.
I guess you could say that when a template is added to a funnel, it creates a stand alone duplicate of itself.
Now that you know why you should use templates, it’s time to move on to the next step: Creating a footer inside ClickFunnels.
Creating The Footer
Luckily for you, creating a footer section inside ClickFunnels is super easy.
It can be done it 6 steps, and I’ll take you through them all right now.
Step #1: Prepare a note with links
The first thing you need to do is to crate a note with all the links to all the important pages:
- Privacy page
- Disclaimer page
- Terms and Conditions page
- Contact page
- About page
- Homepage (optional but recommended)
- Affiliate Disclosure page (optional)
- Blog post page (optional)
- Newsletter page (optional)
How many links you want to add to your footer is up to you, but you should at least add the first 5 of the list above.
Doing that will ensure that you stay compliant with ad platforms and the law in general.
Note: If you don’t have any legal pages yet, ClickFunnels have template for those. I’d suggest that you create a separate funnel with all those pages in there, instead of mixing them in with other funnels. Just link to them.
Or if you’re using WordPress or similar and have your legal pages there, add those links to your footer inside of ClickFunnels.
Step #2: Create the footer section
With the note of links done, it’s time to actually create the footer that will become your template. (I assume that you already have a ClickFunnels account an know your way around it, if not there is a 14-day trial here)
Go ahead and open up the editor for one of your funnel to which you want to add a footer.
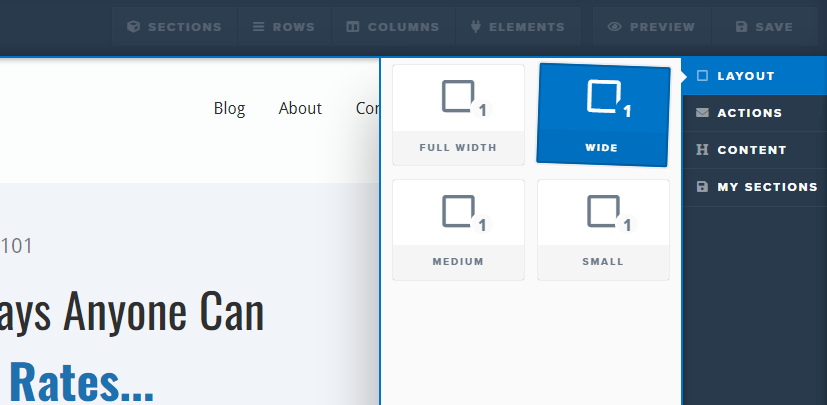
From there scroll to the bottom of the page and add a new section.
I’m going to use a “wide section” for this example.
Step #3: Add a new row
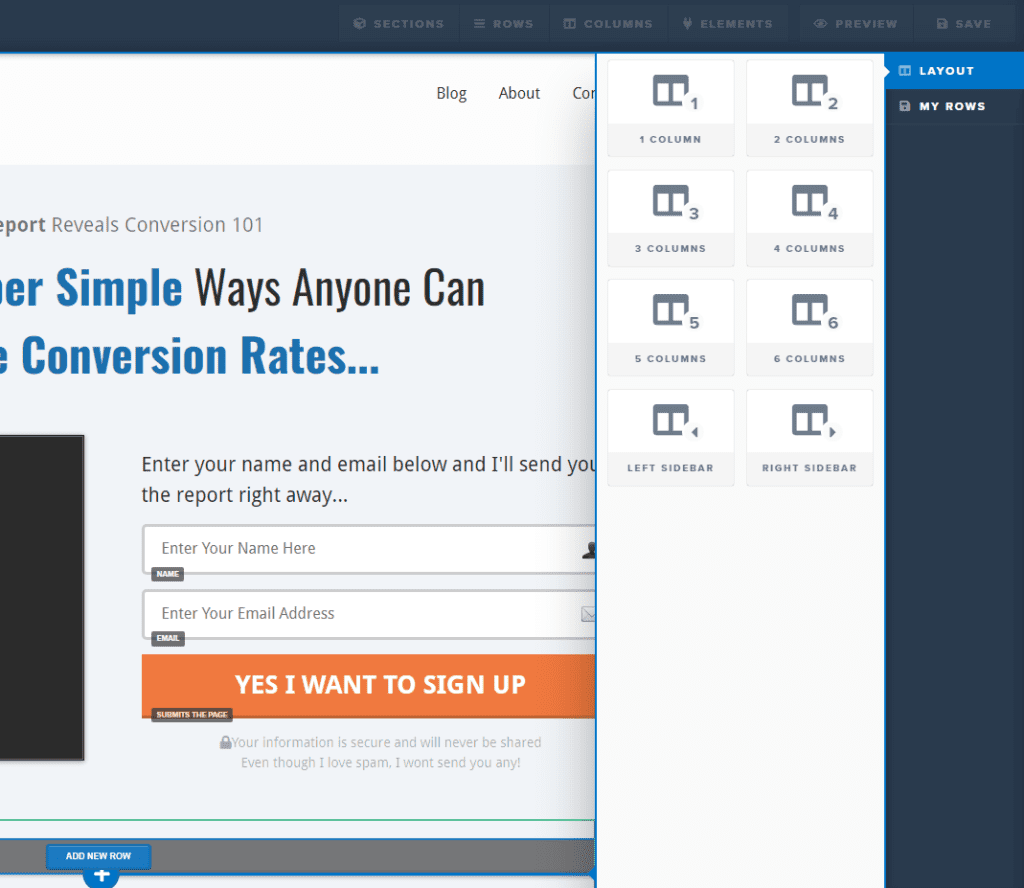
With the section is created, now you need to add a row to it.
Just hover over the section and click on the ‘Add New Row’ button.
I like to use a 1 column row when I design footers, but if you want to structure things differently, feel free to do so.
You can use a 2 column, 3 column, or even a 4 column if that fits your design better.

Step #4: Adding business info
I’m going to keep going with the single row design to make it easy to follow along.
The first thing you need to click on ‘Add New Element’ and then add a paragraph.
In this paragraph you need 3 things.
- Copyright and year
- Business name (brand)
- All rights reserved
Once you’ve added those things you should end up with something that looks like this:


Step #5: Adding the navigation
Below the paragraph you need to add a navigation bar that will link to your legal pages.
Hover over the paragraph and click on the orange ‘+’ sign to add a new element.
Once the menu appears, scroll down to ‘Content Blocks’ and add the navigation block.
Note: You could also use a bullet list with links if you are using 2 or more column rows.
Step #6: Linking it all together
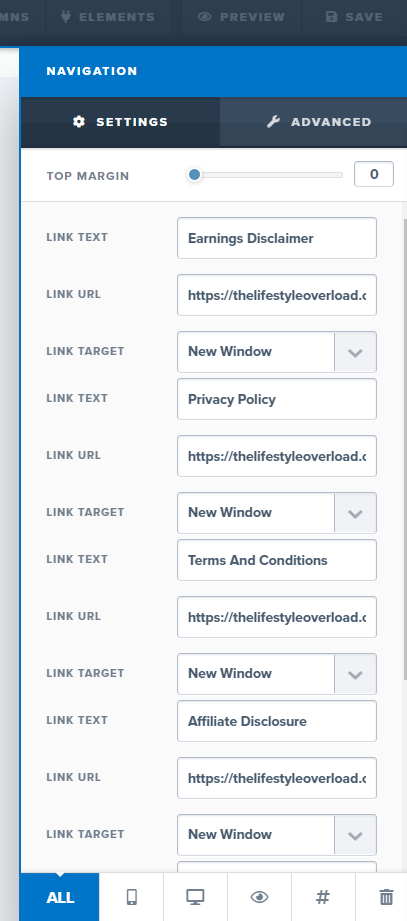
Open the settings for the navigation bar and add all the names to the corresponding legal pages.
What you should end up with is something the looks like this:


Then add the URL:s (from the note earlier) to each of them in the ‘LINK URL’ input fields (this makes them clickable).

Step #6.5: Make it pretty
The last thing you need to do is to make everything look pretty.
You do this by changing:
- Font
- Font size
- Margins
- Colors
I think you’ll figure this one out on your own.
Once you’re done with that, remember to hit ‘Save’ and do a preview and test all the links.
Once everything is working as expected, hit ‘Save’ once more for good measure and your footer is done.
Turn The Footer Into a Template
Now that you have your footer done inside your funnel, it’s time to turn the entire section into a template.
The best thing is that there is only one step to this and it should not take you more than a minute to complete it.
With the funnel you added the footer to open, scroll down to the footer section and hover over it.
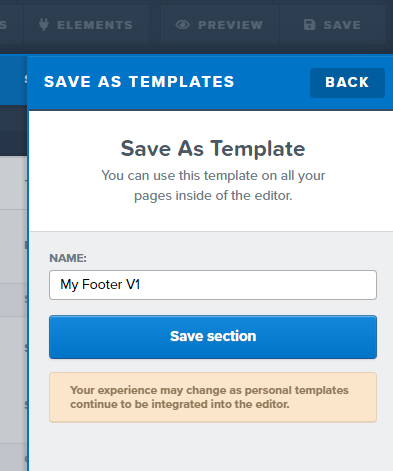
Then click on the ‘Save’ icon to the right.


When the ‘Save As Template’ appears on the right, give your footer a name and click ‘Save Section’.
I like to give my saved sections revision names like V1 and V2 to keep track of what’s new and what’s old.

That’s it, you are done and the template is ready..
Now you can use this footer in every funnel you build inside of ClickFunnels.
Using Your Footer In Your Other ClickFunnels Funnels
So far you’ve created the footer and saved it as a template, and now it’s time to put it to use.
Using templates when building funnels inside of ClickFunnels not hard at all, I would even recommend that you make it a habit to create a use templates.
Back when I was working as a programmer I was told something that stuck to my brain…
Be lazy!
Because writing code takes a ton of time, so why write the same code over and over again?
Save it and use it again in the future.
And the same goes with sales funnels, templates helps you work faster and smarter.
So how do you add your footer template to another funnel?
Step #1: Open the funnel
The first thing you need to do is to find or create a funnel to which you like to add your footer to.
Once you’ve found a funnel you like to add it to, open the editor and go to step #2.
Step #2: Add the template
I’ll clock you for this one, if it takes more than a minute, you’re doing something wrong.
Scroll down to the bottom and click on the green plus sign to add a new section.
Once the menu opens, click on ‘My Section’, and then select the footer template you just created.
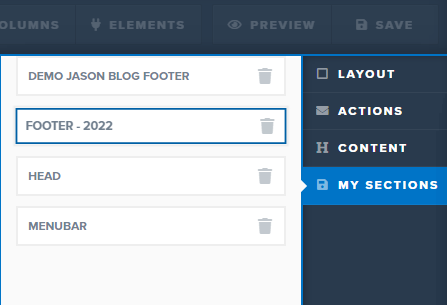

And about 32 seconds later you’re done.
All you have to do now is save the funnel and do a preview and check so everything looks right.
Yes, depending on the overall theme of the funnel, you might have to change some background colors or fonts.
Conclusion
Thanks to ‘ClickFunnels Footer Template: The Ultimate Guide’, you don’t need to spend hours searching for information on how to turn your sections into templates. You have everything you need to get started all in one place.
As you saw in the guide, creating a footer and turing it into a template isn’t that hard. In fact this guide can help you turn any section into a template in only minutes.
Once you get the hang of using templates, you’ll see why using them is a great and easy way to speed up the funnel building process.
Now you have everything you need to start building up an arsenal of great templates.
Before you get started on the next one, make sure to leave a quick comment to let me know what you think of ‘ClickFunnels Footer Template: The Complete Guide’.

